Is your Travis Heights home ready for its close-up? In this neighborhood, buyers fall in love with porch living, leafy streets, and the easy flow between indoor rooms and outdoor spaces. A thoughtful, photo-first prep can help your listing stand out the moment it hits the market. In this guide, you’ll learn exactly how to style your home room by room, boost curb appeal, and plan a smooth, well-timed photo day.
Let’s dive in.
Why photo prep matters in Travis Heights
Travis Heights blends early 20th-century bungalows with sleek modern infill. Buyers often prioritize walkability, proximity to South Congress and Lady Bird Lake, mature trees, and outdoor living. Your photos should bring those lifestyle cues forward.
- Emphasize indoor-outdoor flow with porches, patios, decks, and yard views.
- In bungalows, highlight original wood floors, trim, built-ins, and mantels.
- In modern builds, showcase natural light, large windows, clean sightlines, and open plans.
- Make curb appeal and street context clear, since neighborhood character is part of the value.
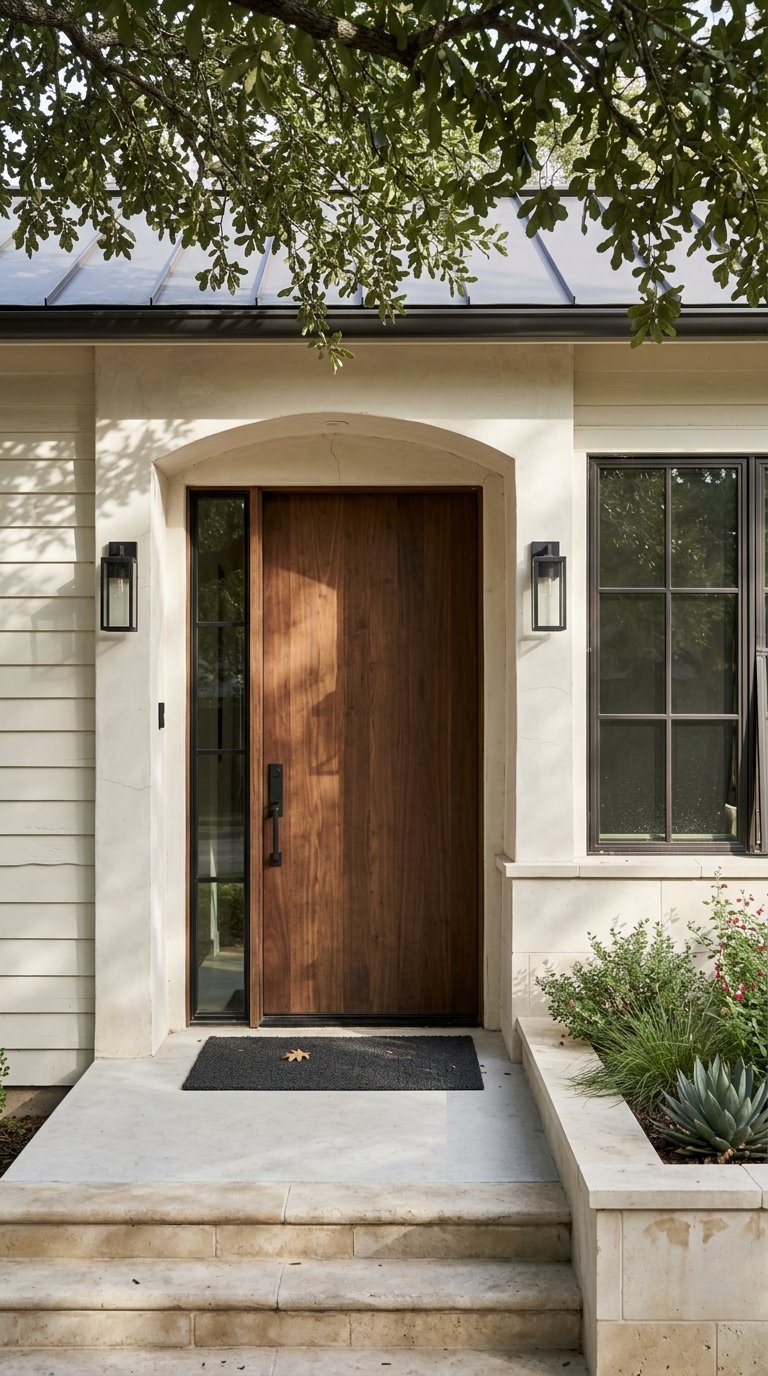
Curb appeal that sells the setting
A strong exterior photo sequence builds trust and sets expectations. Focus on clean lines, fresh landscaping, and a welcoming entry.
- Clean and repair: power-wash paths and driveways, sweep the porch, and remove leaves and debris.
- Quick fixes: touch up paint on visible chips, secure house numbers, and tidy the mailbox and entry hardware.
- Landscaping: mow and edge, add fresh mulch, prune shrubs, and remove dead plants. Place two simple potted plants at the entry.
- Porch staging: add a bench or two chairs, a small table, and a simple outdoor rug. Keep it symmetrical and uncluttered.
- Remove or hide: personal items like bikes and toys, visible window AC units at the front, and satellite dishes in frame if possible.
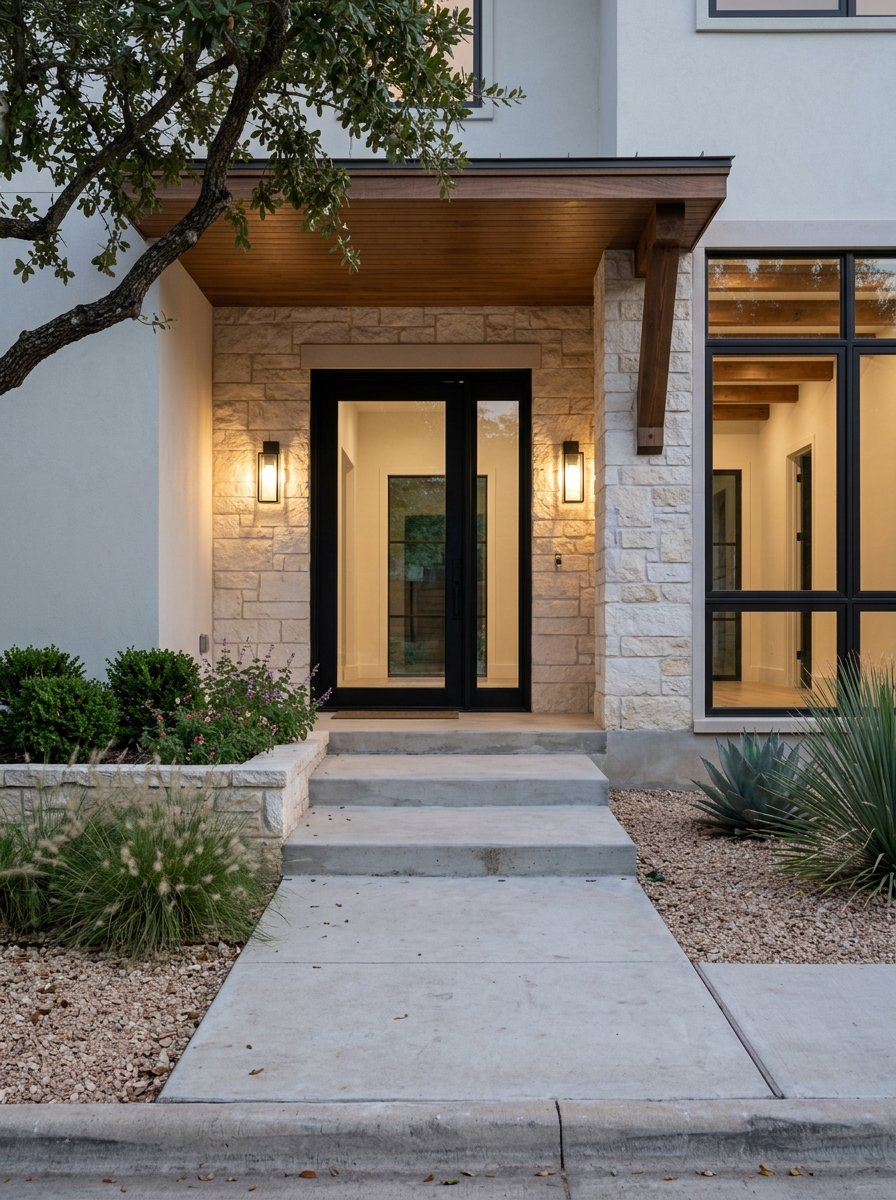
Golden hour vs. twilight
Golden hour occurs shortly before sunset and gives your facade a warm glow with flattering shadows. Twilight follows sunset and captures the home’s interior warmth and exterior lighting for emotional impact. Coordinate precise timing with your photographer based on season and desired look.
Day-of setup for twilight shots
- Turn on all interior lights, porch and entry lights, and any landscape or garage lighting 10 to 15 minutes before shooting.
- Use warm, consistent bulbs to avoid mixed color casts.
- Close blinds that create glare, and open curtains where interior views add depth.
- Ensure all fixtures are clean and working; replace broken bulbs in advance.
- Remove cars from the driveway and public street areas where permitted for an unobstructed view.
Practical lighting notes
- Communicate with your photographer about the extent of exterior lighting so no areas blow out.
- Keep brightness balanced between inside and outside.
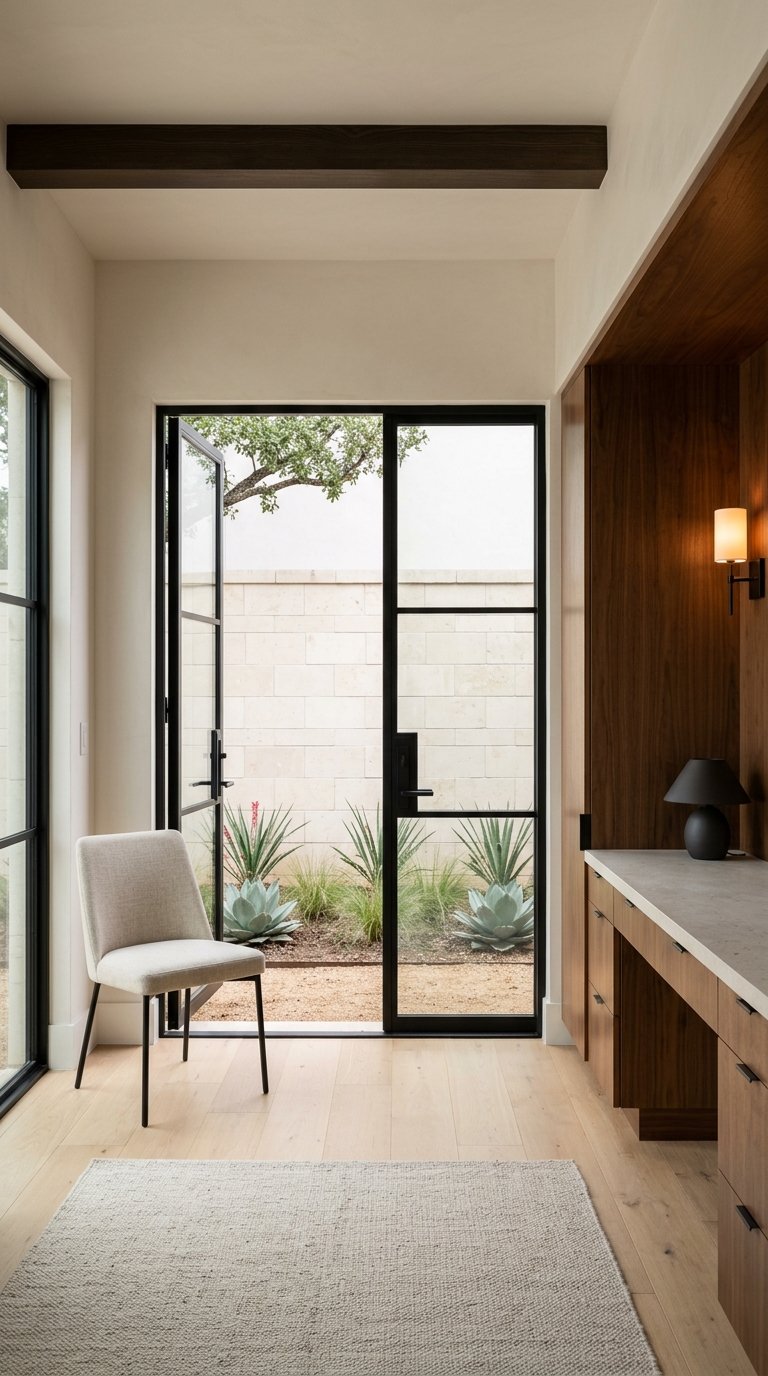
Room-by-room styling that photographs well
Before you tackle individual rooms, apply these general steps throughout the home.
- Declutter and depersonalize: remove family photos, excess decor, and fridge magnets.
- Deep clean windows, mirrors, vents, baseboards, and fixtures.
- Brighten by opening curtains and turning on lamps to soften shadows.
- Set a comfortable temperature and eliminate strong odors. Avoid cooking right before the shoot.
- Right-size rugs and arrange furniture to showcase traffic flow and proportions.
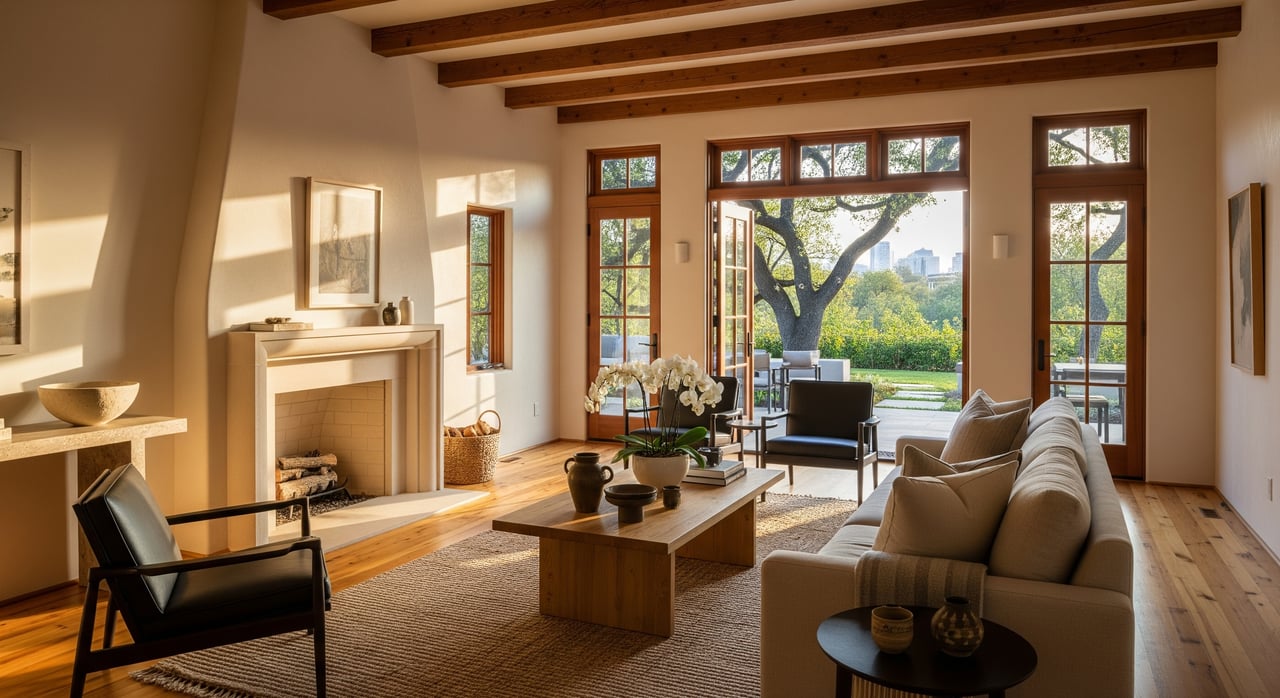
Living room and family room
- Bungalows: spotlight original trim, mantels, built-ins, and wood floors. Pull furniture slightly off walls to show depth and circulation.
- Modern builds: keep decor minimal to emphasize large windows and open sightlines. Add one or two textural accents for warmth.
- Final touches: fluff pillows, fold a throw, create a simple coffee table vignette, hide cords and remotes, and turn on lamps for even light.
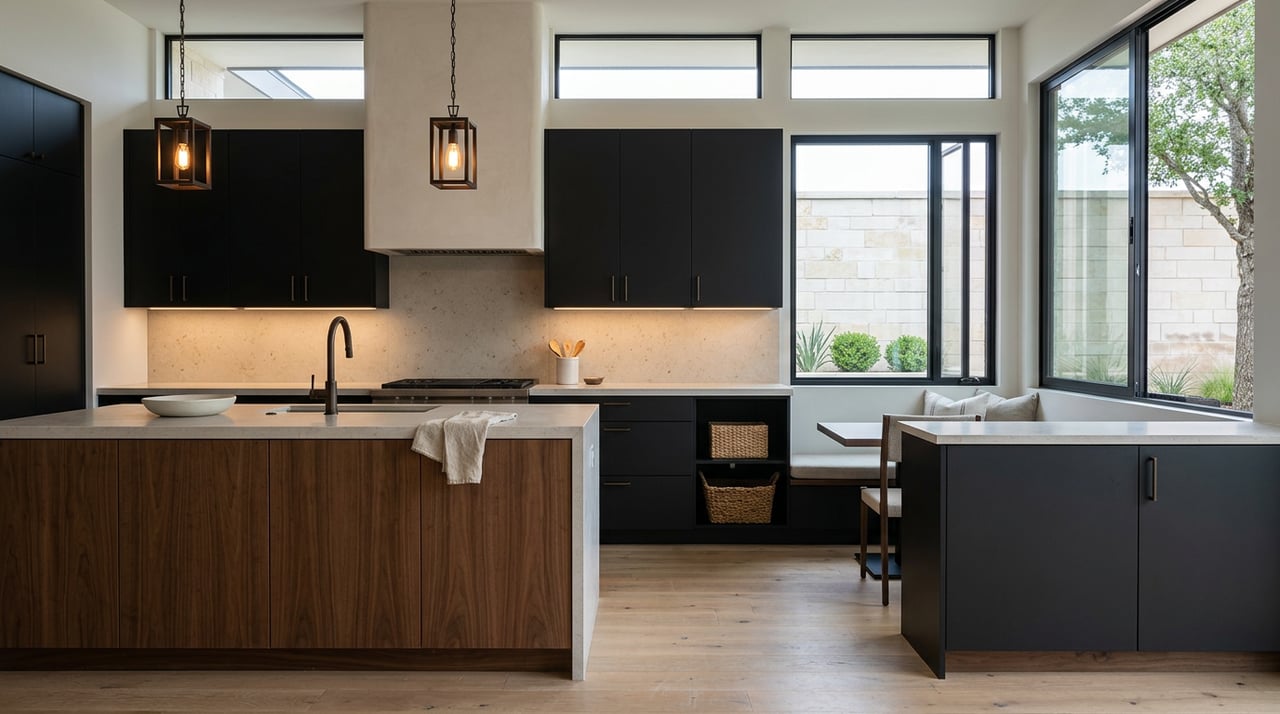
Kitchen
- Clear counters, leaving only one or two high-quality items like a fruit bowl or small vase.
- Remove small appliances from view; polish faucets, stainless steel, and glass.
- Ensure pendant lights are clean and working; update or polish cabinet hardware if it is an easy win on timeline.
- Bungalows: show original cabinetry and molding; pull stools slightly from the island to suggest usable space.
- Modern builds: highlight continuous countertops, waterfall islands, upgraded appliances, and symmetrical styling.
Dining room
- Set the table minimally with a runner or placemats and a small, low centerpiece.
- Remove extra chairs if the table feels crowded.
- Frame the traffic flow to adjacent kitchen or living spaces.
Primary bedroom
- Dress the bed with a clean, neutral duvet, layered pillows, and a neatly folded throw.
- Remove extra furniture to reveal scale and walking space.
- Keep nightstands simple with matching lamps on for even light.
- Bungalows: keep original windows and any window seats visible and unobstructed.
Secondary bedrooms and guest rooms
- Stage with a clear purpose like guest room, nursery, or office, but keep styling neutral.
- Show closet doors partially open if storage is tidy.
Bathrooms
- Clear all toiletries and personal items.
- Put out clean white towels, a small plant, or a candle for warmth without clutter.
- Close toilet lids, polish chrome, and leave shower glass spotless.
- Use mirrors strategically in smaller baths to reflect light and create depth.
Home office or study
- Keep the desktop clear with a laptop or notebook and one accessory like a lamp or plant.
- Highlight natural light and built-in shelves in bungalows when present.
Laundry, utility, and garage
- Sweep floors, hide garbage bins and pet items, and organize shelves.
- Show available counter space for folding and storage capacity.
Outdoor living spaces
- Mow, edge, and sweep; stage patio furniture with cushions.
- Add simple string lights or a clean firepit where realistic.
- On smaller infill lots, define zones like dining and lounge to show usability and privacy.
- Highlight shade trees, mature landscaping, and any appealing view corridors.
Architectural details and hero shots
- Capture mantels, built-in bookcases, vintage trim, original windows, and unique stair details.
- Plan at least one “hero” angle per key room to lead your gallery.
Low-cost upgrades with big impact
If you have limited time or budget, focus on quick wins that photograph beautifully.
- Deep clean and declutter.
- Touch up scuffed doors and trim with fresh paint.
- Update or polish cabinet hardware and door hardware.
- Refresh house numbers and porch seating.
- Add new hand towels, bath mats, and a few fresh plants.
Timeline and photographer coordination
A little scheduling goes a long way. Use this simple runway to stay on track.
7 to 14 days out
- Complete cosmetic fixes like outlet covers, light fixtures, and hardware.
- Schedule deep cleaning and landscaping if needed.
3 to 5 days out
- Remove excess furniture and finalize any staging.
- Do paint touch-ups and confirm shoot time with your photographer.
24 hours out
- Finish cleaning, wash linens, and complete staging placements.
- Pack away everyday items like toiletries, pet bowls, and countertop appliances.
Day of shoot
- Conduct a final walkthrough 1 to 2 hours before the photographer arrives.
- Ensure pets and vehicles are offsite.
- Prepare your lighting plan and assign someone to help switch lights as needed.
Shot list priorities
Share a concise shot list to guide the session.
- Exterior curb appeal, porch, and entry sequence
- Living room and kitchen hero angles
- Primary bedroom and bath
- Outdoor living, deck, patio, and yard
- Architectural details that define the home
Choosing the right photographer
Many listing photographers offer interior, exterior, twilight, and aerial packages. For Travis Heights, tree canopy and tight setbacks can limit drone options, but a skilled pilot can still show lot orientation. Ask to see examples from similar homes to confirm they handle porches, large windows, and narrow lots well.
Bungalow vs. modern: how to style the story
- Bungalows: lead with warmth and character. Center photos on original materials and cozy porch living, using textiles and wood tones to complement historic details.
- Modern builds: lead with space and light. Keep decor minimal to emphasize clean lines, floor-to-ceiling glass, and seamless flow to decks and patios.
When to add twilight photos
Twilight sequences create emotional appeal, especially if your exterior lighting, porch ambiance, or landscaping is a strength. If your facade has distinctive architecture or your outdoor living shines after sunset, a twilight set can increase attention. Coordinate timing and lighting with your photographer to get the look you want.
Ready to take the next step with a curated, high-touch listing plan in Travis Heights? With 17+ years of central Austin experience and specialized marketing credentials, you will get a calm, clear process from prep to photography to launch. If you would like concierge guidance tailored to your home, connect with Amy Sparks for a plan that fits your timeline and goals.
FAQs
What prep has the best ROI for listing photos in Travis Heights?
- Focus on deep cleaning and decluttering, quick paint touch-ups, polished or new hardware, refreshed house numbers and porch seating, and fresh towels and plants.
Do I need permits for real estate photos in Austin?
- You generally do not need permits for standard listing photos; for drone images, follow FAA and local rules and avoid capturing neighboring properties without permission.
Is drone photography useful for Travis Heights homes?
- It can help show lot orientation, but mature trees and proximity to structures may limit angles, so ask for a pilot experienced with similar neighborhoods.
How should I handle pets and personal items on photo day?
- Arrange for pets to be offsite, remove pet bowls and beds, and store personal items like photos, toiletries, and countertop appliances out of view.
What if my rooms are small?
- Use right-sized rugs, remove bulky pieces, pull furniture slightly off walls, maximize natural light, and choose one clear focal angle per room.
When is the best time to shoot exteriors in Travis Heights?
- Golden hour flatters facades with warm light, while twilight showcases interior glow and landscape lighting; coordinate exact timing with your photographer.